Draw the Sun and the Moon – Bit by bit Instructional exercise
Sun and Moon in Only 6 Simple Tasks! We know all about the sun and the moon, as they mark the start and end of every day. Since they are so significant, they show up in various types of artistry simultaneously as pictures, and a well-known contention is that the two converge into a similar structure. You may also learn many things cartoon drawing, scary drawing, cat drawing cartoon drawing, cute drawing, flowers drawing, cute drawing, puppy drawing, and dog drawing.
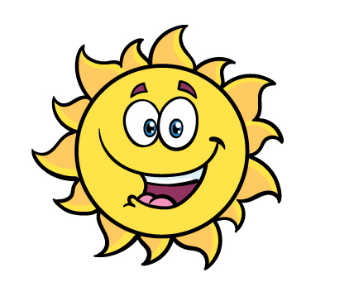
This is an exemplary plan that can be utilized to give an image of how the sun and the moon will draw for this activity. If you have any desire to make your own sun and moon pictures, then, at that point, you’ve come to the ideal locations! This bit-by-bit instructional exercise on the most proficient method to draw the sun and moon will show you that reproducing this drawing is fun and simple. The most effective method to attract the sun and moon has six stages
The most effective method to draw the sun and the moon – get everything rolling! 1 stage
draw the sun and the moon. Stage 1 We’ll begin with two circles in this instructional exercise on the best way to draw the sun and the moon. Regarding drawing a circle, it takes a lot of work to draw an ideal circle the hard way, yet fortunately, there are a couple of devices you can use to make it simpler for yourself. The best thing you can utilize is a circle, and it’s incredible because it’s not costly to purchase, and you can undoubtedly draw circles with a pencil or pen!
If you have a circle, connect a pen or pencil to it, and afterward, utilize a sharp tip to draw the external circle. You can make it as large or as small as you need; however, leave a little space outwardly of the edge for the expansions to draw later. Then, use the pencil to draw one more circle inside the first, which will be near the blueprint. If you don’t have circles, draw each the hard way or round objects. Whenever you’ve done that, you’re presently prepared for stage 2!
2. The means then draw a few beams coming from the sun.
Draw the sun and the moon degrees 2.” The second step of drawing the sun and the moon will be a lot simpler if you have a helpful ruler since you will add a great deal of straight lines to it. In this part, we will attract many sharp figures of the sun.
The distance between the beams of the sun will be equivalent since, in one of the accompanying advances, we will draw a few figures between them. Orchestrate these exceptionally sharp shapes as they are displayed in the reference picture, and if you can keep the stretches still at the end of the day, it will be great!
Stage 3. Presently, draw more between the sharp shapes.
Draw the sun and moon degrees 3.” Now that you’ve added sharp shapes to the picture, in this step, we will show you how to draw the sun and the moon; we will add a few wavy shapes between them. Just utilize wavy lines to make adaptable shapes that end in sharp focuses.
Whenever you’ve drawn them in the manner we thoroughly search in our reference picture, we’ll add subtleties. Utilize a ruler to add a sharp line to the focal point of every straight shape, then define a freehand boundary to add a line to the focal point of each wavy shape.
Stage 4: Next, we draw the eyes and eyebrows.
Draw the sun and the moon degrees 4.” The state of your sun and moon chart is finished, so how about we add a few countenances to draw? Let’s start with the eyes, which you can draw as round shapes with twofold spots on the sides. Then, at that point, draw a circle inside the eyes with dark spots inside everyone.
Then, draw the eyes; you can add the eyebrows. We will use long and slim shapes to draw them, which are adjusted from the internal edge. Then, at that point, you must add a couple more last contacts in the following stage before you can variety your image!
Stage 5. The drawing of the sun and the moon is currently finished.
Draw the sun and the moon degrees 5.” Before we add tones to your picture, we’ll finish the face in this bit-by-bit instructional exercise where we draw the sun and the moon. This is where we will finish the half-sun and half-moon impact. Initially, a bent line is drawn from the sun’s highest point, and afterward, it is joined through the nostrils. Then, proceed with the line from the nose to the lower part of the face.
At long last, you will draw a grinning face on one or the other side of the sun and the moon. Whenever you’ve downloaded these subtleties, you’ve finished every means in this instructional exercise! Be that as it may, besides the fact that you move, you can likewise attract a few components or extra things. Now that you’ve wrapped up drawing, there’s a ton you can do to make with it. We can hardly hold back to see how you choose to clean up your picture.
Reward: Attempt these Additional Subtleties for your drawing
Here, the sun and the moon are practically prepared for variety, yet before we get to the last step, we have